The Best Easy Dessert Recipes: Molten Chocolate Lava Cakes
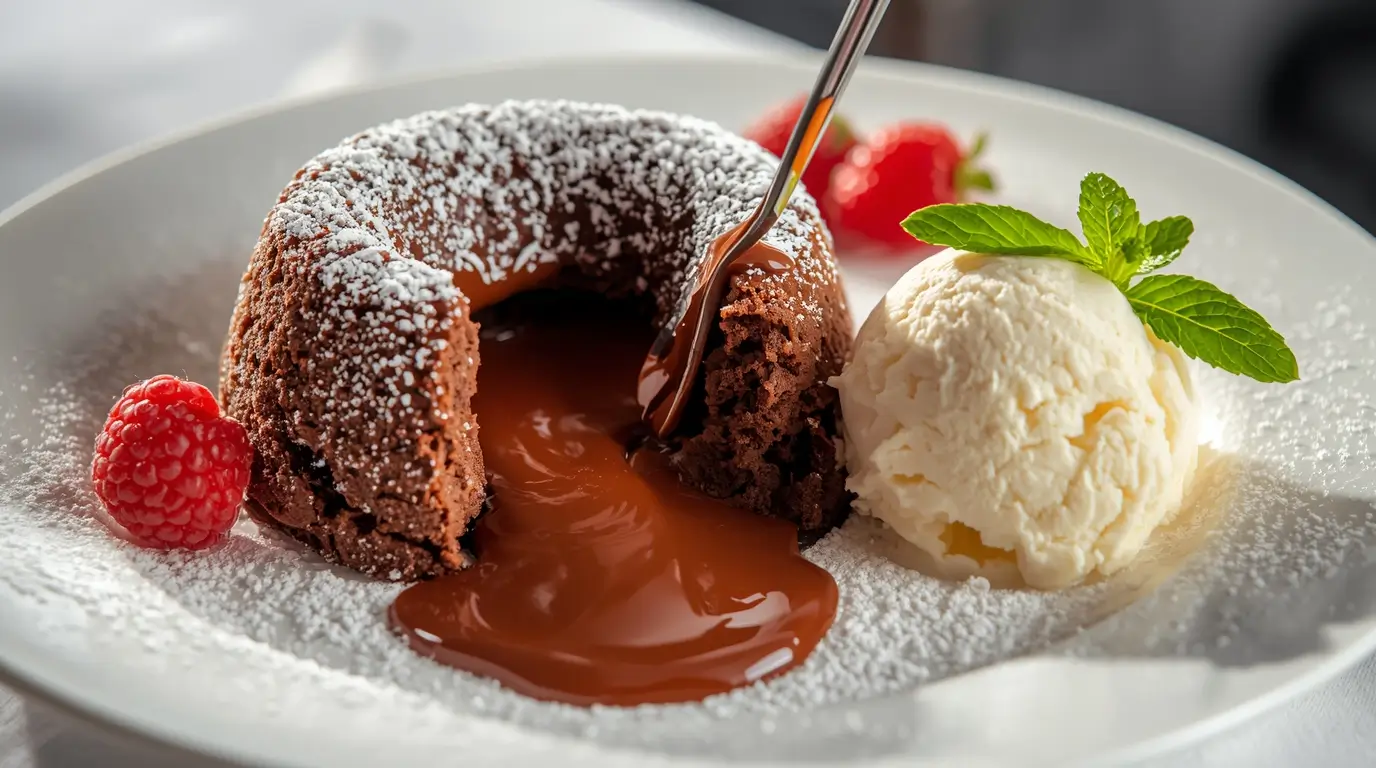
There’s something magical about cracking into a warm chocolate cake and watching that glossy, molten center pour out onto your plate. If you think this kind of decadence requires pastry school credentials, think again. These easy dessert recipes prove that restaurant-quality sweet treats can come together in your kitchen with just a few ingredients and less than 30 minutes.
I’ll never forget my first attempt at lava cakes for a dinner party. Twenty minutes before guests arrived, I was convinced I’d be serving chocolate soup. But here’s the thing – they turned out to be the hit of the evening, with everyone convinced I’d planned that extra-gooey center all along. These simple desserts to make are surprisingly forgiving and deliver big flavor without the complexity of traditional baking projects.
Table of Contents
After the step-by-step recipe, discover expert techniques, creative variations, and insider tips that’ll make you the dessert hero of every gathering.
Recipe Overview
| Prep Time | Cook Time | Total Time | Servings |
|---|---|---|---|
| 15 mins | 12 mins | 27 mins | 4 individual cakes |
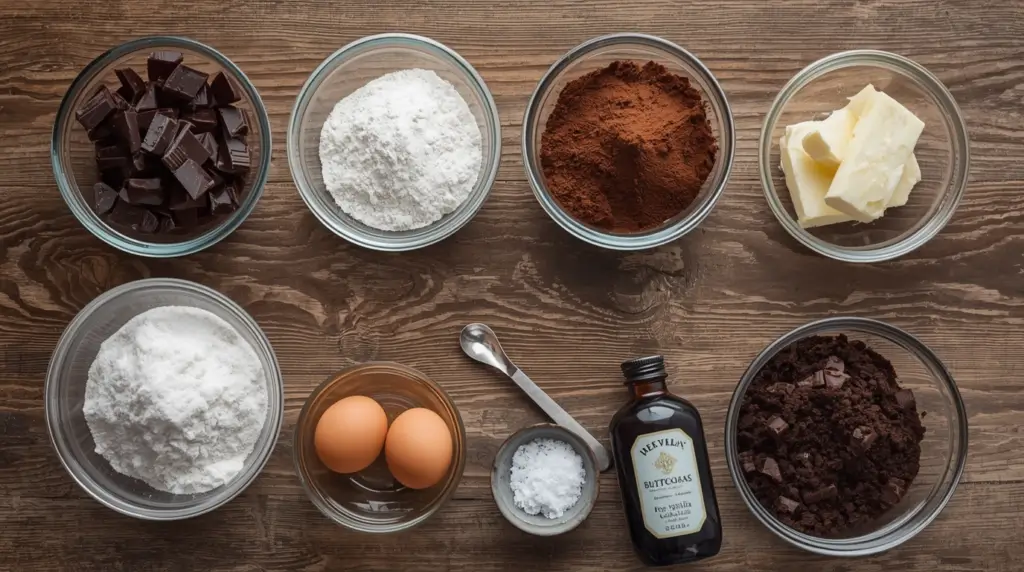
Ingredients
For the Chocolate Lava Cakes:
- 4 oz (113g) high-quality dark chocolate (60-70% cacao), chopped
- 1/2 cup (1 stick) unsalted butter, plus extra for greasing
- 2 large eggs, at room temperature
- 2 large egg yolks, at room temperature
- 1/4 cup (50g) granulated sugar
- Pinch of fine sea salt
- 2 tablespoons all-purpose flour
- 1 teaspoon pure vanilla extract
For Preparing the Ramekins:
- 1 tablespoon softened butter
- 2 tablespoons cocoa powder (for dusting)
Optional Toppings & Accompaniments:
- Vanilla ice cream or whipped cream
- Fresh raspberries or strawberries
- Powdered sugar for dusting
- Fresh mint leaves for garnish
Recipe Variations & Creative Twists
- White Chocolate Version: Swap dark chocolate for white chocolate and add 1/2 teaspoon almond extract for an elegant alternative
- Peanut Butter Center Surprise: Press a frozen peanut butter ball into the center before baking for an unexpected twist
- Espresso Enhancement: Add 1 teaspoon instant espresso powder to intensify the chocolate flavor
- Salted Caramel Core: Drop a teaspoon of salted caramel into each ramekin before adding batter
- Nutella Variation: Replace 2 oz of dark chocolate with Nutella for hazelnut lovers
- Gluten-Free Option: Substitute flour with almond flour or cornstarch for a gluten-free treat
- Individual Brownie Bites: Bake in mini muffin tins for 6-7 minutes for bite-sized sweet treats
Timing & Temperature Guide
Planning Your Dessert Timeline
These easy dessert recipes require minimal advance preparation, making them perfect for spontaneous entertaining. The batter comes together in under 15 minutes, and because everything bakes simultaneously, you’ll have warm, impressive desserts ready in less than half an hour from start to finish.
Temperature Precision for Perfect Results
The secret to achieving that signature molten center lies in precise oven temperature and timing. Too hot or too long, and you’ll have regular chocolate cakes (still delicious, but not the show-stopping lava effect). Too cool or too short, and the structure won’t set properly.
Preparation Timeline Breakdown
| Phase | Temperature | Duration |
|---|---|---|
| Butter & Chocolate Melting | Low heat (double boiler) | 3-4 minutes |
| Ramekin Preparation | Room temperature | 3 minutes |
| Batter Mixing | Room temperature | 5 minutes |
| Oven Preheating | 425°F (220°C) | 10 minutes |
| Baking Time | 425°F (220°C) | 11-13 minutes |
| Resting Period | Room temperature | 1 minute |
| Serving Window | Warm | 5-10 minutes optimal |
Step-by-Step Instructions: From Mixing Bowl to Molten Magic
Preparing Your Foundation
Ramekin Preparation:
- Generously butter four 6-oz ramekins, making sure to coat every surface including the rim
- Add a tablespoon of cocoa powder to one ramekin, then tilt and rotate to coat completely
- Pour excess cocoa into the next ramekin and repeat until all four are coated
- Place prepared ramekins on a baking sheet and set aside
- Preheat your oven to 425°F (220°C) – this high temperature is crucial
Melting the Chocolate Base:
- Create a double boiler by placing a heat-safe bowl over a pot of simmering water
- Add chopped chocolate and butter to the bowl
- Stir occasionally until completely melted and smooth (about 3-4 minutes)
- Remove from heat and let cool slightly while you prepare the egg mixture
- The mixture should be warm but not hot to the touch
Building the Batter
Egg Mixture Preparation:
- In a separate mixing bowl, combine whole eggs, egg yolks, and sugar
- Whisk vigorously for 2-3 minutes until the mixture becomes pale and slightly thickened
- Add the pinch of salt and vanilla extract
- The mixture should ribbon slightly when you lift the whisk
Combining Components:
- Pour the melted chocolate mixture into the egg mixture
- Gently fold together using a rubber spatula until just combined
- Sift the flour over the batter to prevent lumps
- Fold gently until no flour streaks remain – don’t overmix
- The batter should be smooth, glossy, and pourable
Baking These Quick and Easy Desserts
Final Assembly:
- Divide the batter evenly among the four prepared ramekins (about 3/4 full)
- Tap each ramekin gently on the counter to release any air bubbles
- Arrange ramekins on the baking sheet with space between each
- Place the baking sheet in the center of the preheated oven
The Critical Baking Window:
- Bake for exactly 11-13 minutes depending on your oven
- The edges should be firm and slightly pulling away from the sides
- The centers should still look slightly soft and jiggly when gently shaken
- A toothpick inserted halfway should come out with wet crumbs
- Remember: underbaking slightly is better than overbaking
The Grand Reveal
Unmolding and Presentation:
- Remove from oven and let rest for exactly 1 minute on the baking sheet
- Run a thin knife around the edge of each ramekin
- Place a dessert plate upside down over each ramekin
- Using oven mitts, flip confidently and firmly in one motion
- Lift the ramekin slowly – the cake should release easily
- If it sticks, tap the bottom of the ramekin gently
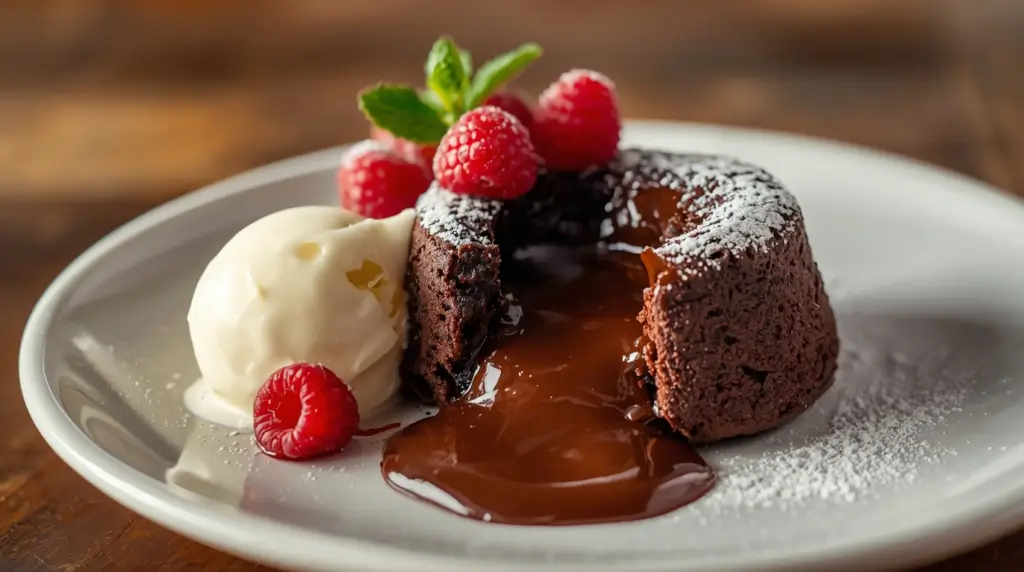
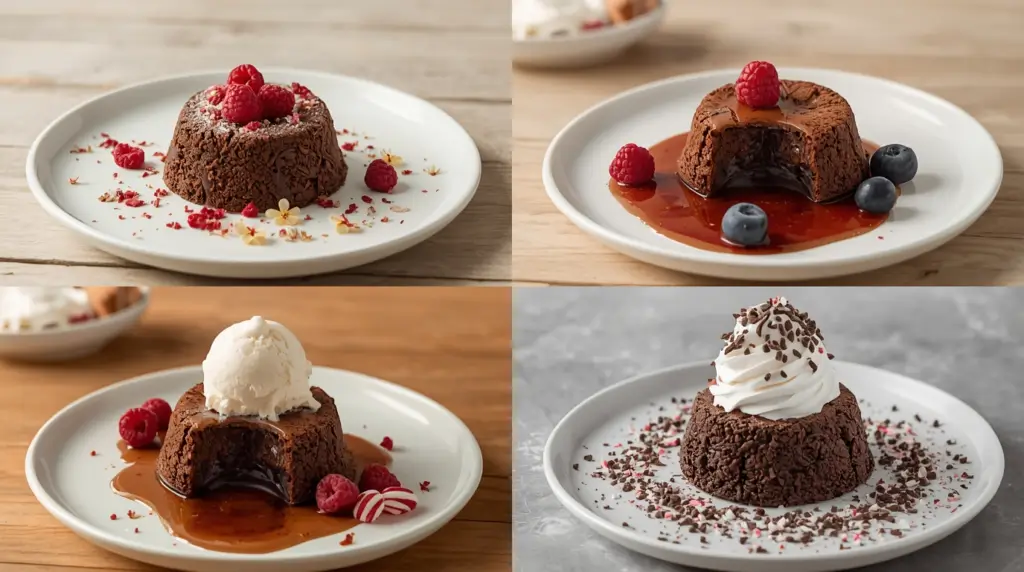
Finishing Touches:
- Dust with powdered sugar using a fine-mesh sieve
- Add a scoop of vanilla ice cream on the side for temperature contrast
- Garnish with fresh berries and a mint sprig
- Serve immediately while the center is still molten
- Watch your guests’ faces light up when they cut into the center
Nutritional Information with a Side of Indulgence
While these few ingredient desserts are undeniably rich, they’re also perfectly portioned. The individual serving size naturally controls portions while delivering maximum satisfaction. Dark chocolate provides antioxidants and mood-boosting compounds, while eggs contribute high-quality protein and essential nutrients.
The beauty of making great desserts at home means you control the ingredients – using quality chocolate and real butter creates a more satisfying treat than many store-bought alternatives loaded with preservatives and artificial flavors.
| Nutrient | Amount per Serving |
|---|---|
| Calories | 425 |
| Total Fat | 32g |
| Saturated Fat | 19g |
| Cholesterol | 215mg |
| Sodium | 150mg |
| Total Carbohydrates | 28g |
| Dietary Fiber | 3g |
| Sugars | 22g |
| Protein | 7g |
| Calcium | 4% DV |
| Iron | 15% DV |
Want to explore the techniques, troubleshooting tips, and secret tricks that separate good lava cakes from extraordinary ones? Keep reading!
Why These Simple Desserts to Make Will Change Your Entertaining Game
- Impressive results with minimal skill required – no pastry degree necessary
- Small ingredient list means less shopping and fewer leftover items cluttering your pantry
- Quick preparation fits into even the busiest schedules without stress
- Individual portions eliminate the need for slicing and serving complications
- Make-ahead friendly batter can be prepared hours in advance and chilled
- Guaranteed wow factor that makes you look like a professional pastry chef
- Adaptable to dietary needs with simple substitutions that don’t compromise flavor
From Simple Concept to Showstopping Finale
The genius of lava cakes lies in their deceptive simplicity. What appears to be an elaborate French dessert is actually a straightforward batter baked just until the edges set while the center remains gloriously liquid. This isn’t complicated chemistry – it’s smart timing wrapped in chocolate luxury.
The Magic Behind the Molten Center
The science of these sweet treats to make at home revolves around understanding how eggs and chocolate behave under heat. The exterior batter sets quickly at high temperature, creating a protective shell. Meanwhile, the center remains protected from direct heat, staying liquid and luscious. The brief resting period allows the structure to stabilize just enough for unmolding while keeping that signature flow intact.
Temperature control makes the difference between success and disappointment. Room temperature eggs incorporate more smoothly, creating better structure. High-quality chocolate with a higher cocoa butter content stays more fluid when warm, producing that coveted lava effect.
How This Recipe Became a Dinner Party Legend
There’s a reason lava cakes have dominated dessert menus for decades. They deliver restaurant elegance with home-kitchen simplicity. The individual presentation feels special, the interactive element of breaking into the center creates a memorable moment, and the combination of textures keeps every bite interesting.
| Feature | Standard Chocolate Cake | Molten Lava Cakes |
|---|---|---|
| Preparation Time | 45-60 minutes | 15 minutes |
| Baking Time | 30-40 minutes | 11-13 minutes |
| Skill Level Required | Intermediate | Beginner-friendly |
| Presentation Impact | Traditional | Show-stopping |
| Texture Variety | Uniform throughout | Multiple textures |
| Serving Flexibility | Must cool completely | Best served warm |
| Make-Ahead Potential | Bake days ahead | Batter holds 8 hours |
Selecting Ingredients That Make the Difference
Creating exceptional easy dessert recipes starts with quality ingredients. Since this recipe relies on so few components, each one plays a starring role in the final result.
- Chocolate Selection: Choose chocolate you’d enjoy eating on its own. Brands like Ghirardelli, Lindt, or Valrhona deliver superior flavor. Avoid chocolate chips – they contain stabilizers that prevent proper melting.
- Butter Quality: European-style butter with higher fat content creates a richer, silkier texture. The butter’s flavor comes through clearly, so use the good stuff.
- Egg Freshness: Fresh eggs whip better and create more stable structure. Room temperature eggs incorporate more smoothly into the chocolate mixture.
- Flour Considerations: All-purpose flour provides just enough structure. The small amount used creates a delicate crumb without heaviness.
- Salt Matters: A pinch of fine sea salt intensifies the chocolate flavor without making the dessert taste salty.
Advance Preparation Strategies
The beauty of these quick and easy desserts lies in their flexibility. Prepare the batter up to 8 hours ahead, pour into prepared ramekins, cover with plastic wrap, and refrigerate. When ready to bake, add 2-3 extra minutes to account for the chilled batter. This makes them perfect for dinner parties – do the work early, then simply slide them in the oven while you’re clearing the main course.
Professional Techniques for Foolproof Results
Transform your simple desserts to make from good to extraordinary with these insider techniques developed through countless batches.
Mistakes That Sabotage Success
- Overgreasing Tragedy: Too much butter in the ramekins causes the cakes to slide and lose their shape. A generous but even coat is sufficient.
- Overmixing Disaster: Vigorous stirring after adding flour develops gluten, creating tough, cakey results instead of the tender texture you’re after.
- Temperature Guesswork: Every oven runs differently. Invest in an oven thermometer to ensure your 425°F is actually 425°F.
- Timing Laziness: Sixty seconds can mean the difference between molten perfection and fully-baked disappointment. Set a timer and watch carefully.
- Skipping the Rest: Flipping immediately causes structural collapse. That one-minute rest is non-negotiable.
Advanced Techniques for Next-Level Results
The Freezer Method: For guaranteed molten centers every time, freeze filled ramekins for 30 minutes before baking. Bake directly from frozen, adding 2 minutes to the cooking time. The frozen center stays liquid while the edges bake perfectly.
The Finger Test: Gently press the center of a cake at 11 minutes. It should feel soft but not liquid. If it feels completely firm, you’ve gone too far.
The Temperature Calibration: Make a test cake first if you’re nervous. Every oven behaves differently, and finding your perfect timing eliminates anxiety when you’re cooking for guests.
Creative Variations for Every Occasion
Seasonal Transformations
Spring Garden Party: Add 1 teaspoon rose water to the batter and top with crushed freeze-dried raspberries and edible flowers.
Summer Berry Celebration: Press a frozen berry into the center before baking, then top with lemon whipped cream and fresh berry compote.
Autumn Spice Warmth: Add 1/2 teaspoon cinnamon and 1/4 teaspoon cardamom to the batter, serve with cinnamon ice cream and candied pecans.
Winter Holiday Magic: Incorporate 1 tablespoon peppermint extract and top with crushed candy canes and chocolate shavings.
Flavor Profile Adventures
Mexican Chocolate Inspiration: Add 1/2 teaspoon cinnamon and a pinch of cayenne pepper for subtle heat that enhances the chocolate.
Italian Affogato Style: Drizzle with a shot of hot espresso at the table and serve with vanilla gelato.
French Patisserie Touch: Add 1 teaspoon orange zest to the batter and serve with orange-scented crème anglaise.
American Classic Remix: Stir mini marshmallows and graham cracker crumbs into the center for s’mores-inspired magic.
Presentation That Elevates These Great Desserts
Plating Like a Pro
The visual impact of these few ingredient desserts begins before the first bite. Use white or light-colored plates to showcase the dark chocolate color. Create contrast with pale ice cream or whipped cream. Add height with a dusting of powdered sugar that catches the light.
For restaurant-style presentation, create a swoosh of chocolate or caramel sauce across the plate before placing the cake. Position garnishes strategically – a single perfect raspberry speaks louder than a handful scattered randomly. Remember that odd numbers of garnish elements (three berries, five mint leaves) create more visually appealing compositions.
Complementary Accompaniments
Classic Pairings:
- Vanilla bean ice cream with real vanilla seeds visible
- Lightly sweetened whipped cream with a touch of vanilla
- Fresh raspberries or strawberries for tartness
- Crushed pistachios for color and crunch
Elevated Additions:
- Salted caramel sauce drizzled artistically
- Crème anglaise pooled beneath the cake
- Fresh berry coulis for special occasions
- Fruit coulis in contrasting colors
Beverage Matches:
- Rich espresso or cappuccino
- Hot chocolate with whipped cream
- Spiced chai tea or vanilla steamer
- Hazelnut or caramel latte
Storage Solutions and Second-Day Success
While these sweet treats to make at home taste best fresh from the oven, life sometimes requires flexibility. Unbaked batter-filled ramekins store beautifully in the refrigerator for up to 8 hours, covered tightly with plastic wrap. For longer storage, freeze filled ramekins for up to one month, then bake directly from frozen, adding 3-4 minutes to the standard baking time.
Already-baked cakes can be refrigerated overnight, though they’ll lose some of their molten magic. Reheat gently in a 350°F oven for 5-7 minutes to warm through. The centers won’t be liquid anymore, but they’ll still be fudgy and delicious – more like warm chocolate brownies.
Leftover Transformation Ideas: Crumble leftover cakes over ice cream, blend into milkshakes, layer into parfaits with whipped cream and berries, or use as the chocolate component in trifles.
FAQ: Solving Your Dessert Dilemmas
How do I know when these easy dessert recipes are perfectly done? The edges should be firm and pulling slightly away from the ramekin sides, while the center jiggles slightly when gently shaken. At 11 minutes, start checking. Better slightly underdone than overdone.
Can I make the batter ahead for these simple desserts to make? Absolutely! Prepare the batter up to 8 hours ahead, fill the ramekins, cover tightly, and refrigerate. Add 2-3 minutes to the baking time when cooking from cold.
What if I don’t have ramekins for these quick and easy desserts? Use muffin tins for mini versions (reduce baking time to 6-8 minutes) or an 8-inch square pan for a shareable version (increase time to 18-20 minutes, though you’ll lose the individual molten centers).
My chocolate seized while melting – can I save it? If chocolate becomes grainy or clumpy, it’s likely due to water contact. Start over with fresh chocolate, ensuring all utensils are completely dry and the double boiler water doesn’t boil too vigorously.
How can I make these few ingredient desserts gluten-free? Replace the all-purpose flour with almond flour, cornstarch, or a gluten-free flour blend. The texture may be slightly different but will still be delicious.
What if my cakes don’t unmold cleanly? Ensure you’ve buttered and cocoa-dusted thoroughly. If a cake sticks, let it rest another 30 seconds, then try again. Worst case, scoop it onto the plate – it’ll taste just as good!
Can I use milk chocolate instead of dark for these sweet treats to make at home? You can, but the result will be much sweeter and less complex. If using milk chocolate, reduce the sugar to 2 tablespoons to prevent cloying sweetness.
How do I reheat these great desserts if I have leftovers? Microwave individual cakes for 20-30 seconds, or reheat in a 350°F oven for 5-7 minutes. The center won’t be liquid anymore, but they’ll still taste wonderful.
Ready to master these foolproof easy dessert recipes that’ll make you the hero of every gathering? Grab your ramekins and create some molten magic that’ll have everyone asking for your secret!
Leave a Review
There are no reviews yet. Be the first one to share your molten masterpiece!
Leave a Review
There are no reviews yet. Be the first one to write one.