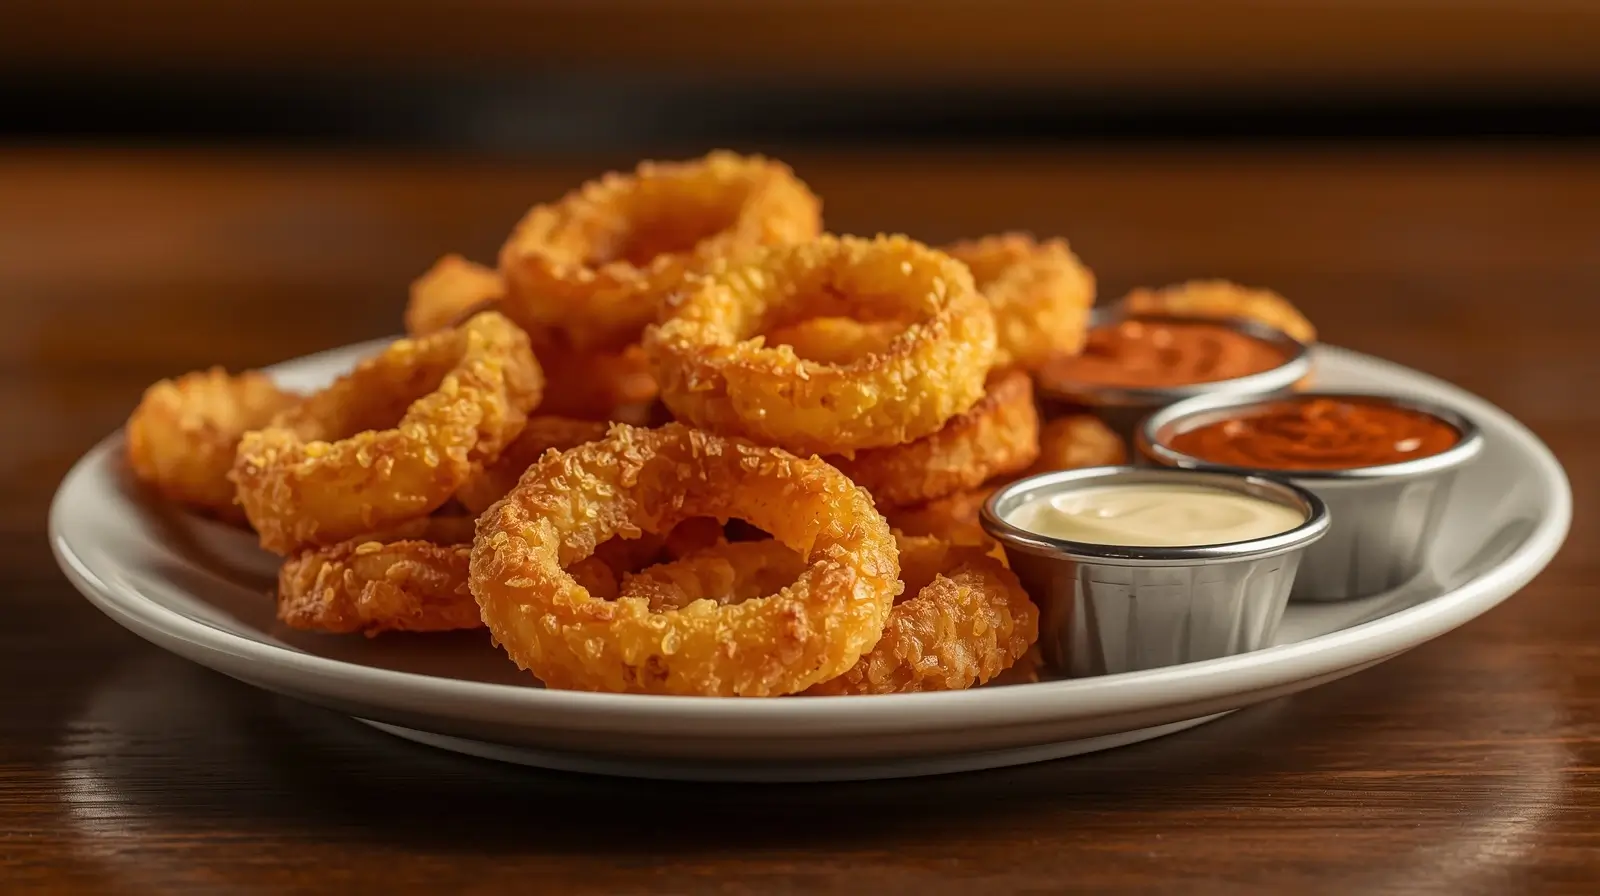
Frozen Onion Rings in Air Fryer – Extra Crispy in 8 Minutes
Frozen onion rings in air fryer cook perfectly at 400°F for 6-8 minutes, no thawing needed. The high heat creates an extra crispy, golden coating while keeping the onions tender inside, exactly what you want from restaurant-style onion rings.
Compared to deep frying (messy oil, high calories) or oven baking (20+ minutes, often soggy), this delivers perfectly crispy onion rings in about 8 minutes. The air fryer’s circulating heat crisps the breading evenly on all sides, something you can’t achieve with other methods.
Perfect for game day snacks, burger sides, or quick appetizers when you need something crispy and satisfying. You’ll get evenly cooked onion rings with golden, crunchy coating every time. The 400°F temperature is key; high enough to crisp the breading quickly without burning.
Table of Contents
Quick Info
| Prep Time | Cook Time | Total Time | Servings |
|---|---|---|---|
| 0 minutes | 6-8 minutes | 6-8 minutes | 3-4 cups (3-4 people) |
Equipment Needed
- Air fryer (any size works, minimum 3-quart)
- Tongs or spatula (for flipping)
- Optional: Kitchen timer, serving plate
A heads up: Don’t overcrowd the basket. Onion rings need space for air to circulate around each ring. Packed rings = soggy breading.
This same high-heat method works for other frozen breaded foods like mozzarella sticks, fish sticks, and chicken nuggets.
Ingredients
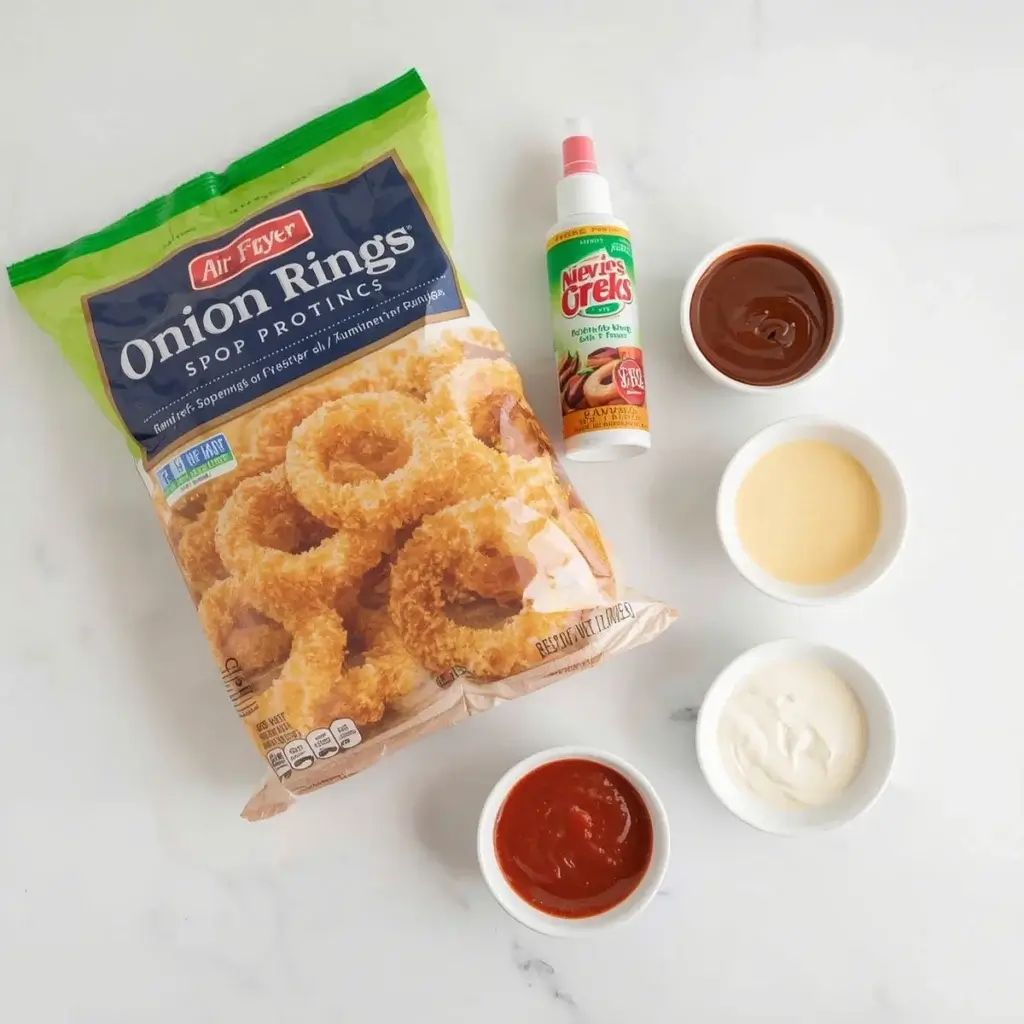
For the onion rings:
- 1 bag frozen breaded onion rings (12-16 oz, any brand)
- Cooking spray (optional; most rings don’t need it)
Optional dipping sauces:
- Ranch dressing (classic)
- BBQ sauce
- Chipotle mayo
- Honey mustard
- Sriracha mayo
- Ketchup
Note: Frozen onion rings are pre-breaded and pre-seasoned. No additional seasoning needed, just cook and serve with your favorite dipping sauce.
How to Cook Frozen Onion Rings in Air Fryer
Step-by-Step Instructions
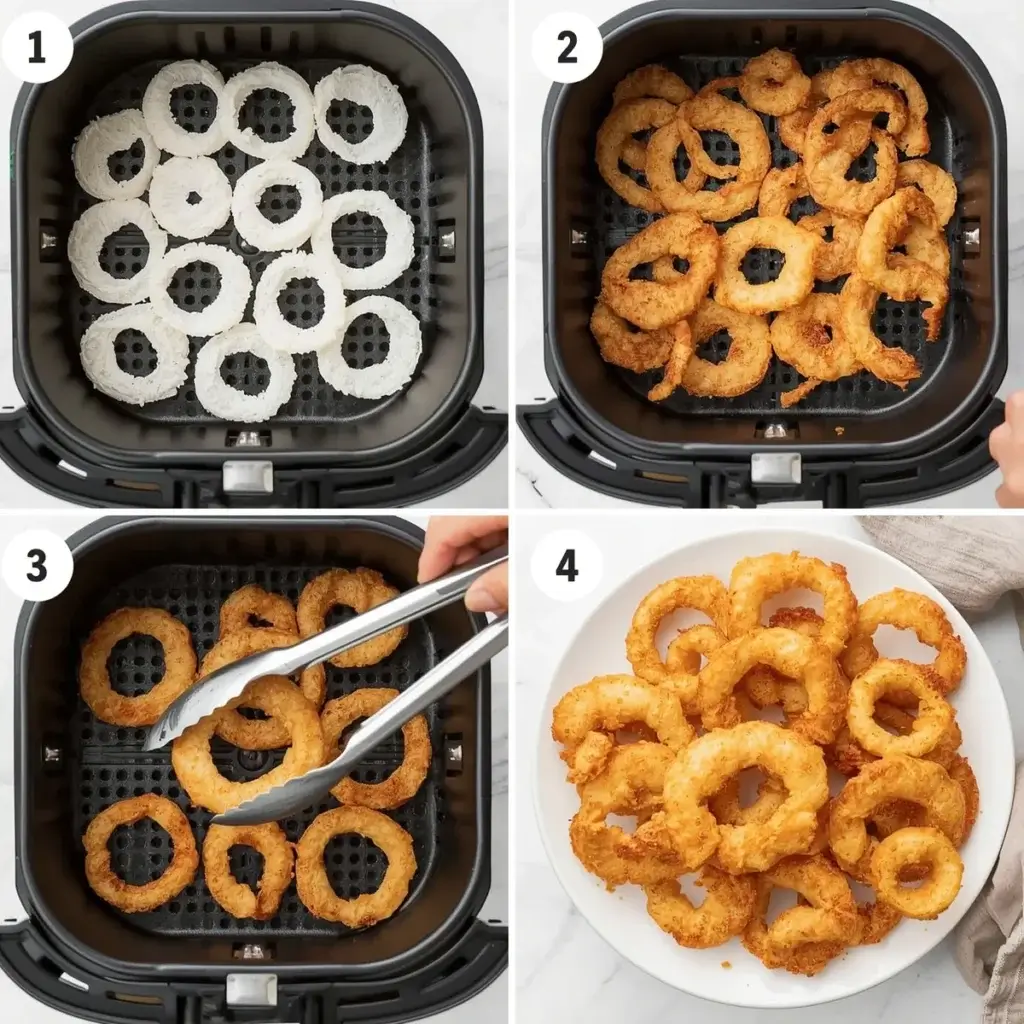
Step 1: Preheat the air fryer
Set your air fryer to 400°F and preheat for 3 minutes. Starting with a hot basket ensures the breading starts crisping immediately.
Preheating makes a noticeable difference; onion rings start crisping right away instead of getting soggy first.
Step 2: Arrange onion rings in basket
Arrange the frozen onion rings in a single layer in the air fryer basket. Don’t stack them, each ring should lie flat with space around it.
If you have more than fits in one layer, cook in batches. Each batch only takes 6-8 minutes anyway.
Step 3: Cook first side
Cook at 400°F for 4 minutes without opening the basket. The rings need this time undisturbed to start crisping.
Resist the urge to check early, let them cook the full 4 minutes before flipping.
Step 4: Flip the rings
At the 4-minute mark, use tongs to flip each onion ring over. This helps achieve uniform browning and crispiness on both sides.
Flip gently to avoid breaking the breading. A quick flip is all you need, they don’t stick to the basket.
Step 5: Finish cooking
Cook for another 2-4 minutes until the breading is golden brown and crispy. Thin rings need 6-7 minutes total, while thick rings need the full 8 minutes.
The rings are ready when the breading is deep golden and crispy all over. If not crispy enough, add 1 more minute.
Step 6: Serve immediately
Remove the onion rings and serve right away with your favorite dipping sauce. They’re best enjoyed while hot and crispy.
Onion rings lose crispiness as they cool. Eat them fresh from the air fryer for best texture.
Air Fryer Onion Rings Time and Temp
| Ring Thickness | Temperature | Total Time | Flip Time |
|---|---|---|---|
| Thin/regular rings | 400°F | 6-7 min | Flip at 3-4 min |
| Thick-cut rings | 400°F | 7-8 min | Flip at 4 min |
| Extra-thick/jumbo | 400°F | 8-9 min | Flip at 4-5 min |
Nutrition Information
Per Serving (1 cup onion rings, about 6-8 rings):
- Calories: 180
- Protein: 3g
- Total Fat: 8g
- Saturated Fat: 1g
- Carbohydrates: 24g
- Fiber: 2g
- Sugar: 3g
- Sodium: 320mg
✅ Quick snack • Party-ready • Crispy coating
⚠️ Important Note
Nutrition values are for standard frozen breaded onion rings air fried without additional oil. Air frying uses significantly less oil than deep frying while still delivering a crispy coating. Values vary by brand and ring thickness. (Values are approximate and vary by brand.)
📊 Source: USDA FoodData Central – Onion Rings
Frozen Onion Rings Air Fryer: Cooking Variations
By Brand
Alexia (premium/organic): 400°F for 7-8 minutes. Thicker breading and larger rings. Flip at 4 minutes. Crispy coating with real onion flavor.
Nathan’s: 400°F for 6-7 minutes. Classic beer-battered style. Flip at 3-4 minutes. Light, crispy coating. Most common grocery store brand.
Ore-Ida: 400°F for 6-7 minutes. Thin, crispy coating. Flip at 3 minutes. Budget-friendly with consistent quality.
Store brand (Kroger, Great Value, etc.): 400°F for 6-8 minutes. Results may vary slightly by brand, test one batch first. Most are similar to name brands.
Restaurant-style (TGI Friday’s, Applebee’s): 400°F for 7-8 minutes. Thicker breading, bigger rings. Flip at 4 minutes. Premium coating.
Pro tip: Many people prefer Nathan’s and Alexia for their crisp texture and flavor, but most brands cook similarly in the air fryer.
By Thickness
Thin/regular rings (standard): 400°F for 6-7 minutes. Flip at 3-4 minutes. These are most common and easiest to cook perfectly.
Thick-cut rings: 400°F for 7-8 minutes. Flip at 4 minutes. Need extra time for the onion center to cook through while breading crisps.
Extra-thick/jumbo rings: 400°F for 8-9 minutes. Flip at 4-5 minutes. Watch closely, these can burn on outside before inside cooks if too hot.
Beer-battered style: 400°F for 6-7 minutes. Flip at 3-4 minutes. Usually thinner coating that crisps quickly.
Pro tip: If your bag has mixed sizes, remove smaller rings at 6 minutes and let larger ones cook the full 8 minutes.
By Desired Texture
Extra crispy: Cook at 400°F for 7-8 minutes. Optional light oil spray before cooking. Flip at 4 minutes. The breading will be darker golden and super crunchy.
Standard crispy: Cook at 400°F for 6-7 minutes. No oil spray needed. Flip at 3-4 minutes. Golden brown with satisfying crunch.
Lighter/less crispy: Cook at 380°F for 6-7 minutes. Flip at 3 minutes. The coating will be lighter and less crunchy (good if you prefer softer breading).
Pro tip: Most people prefer extra crispy. Add 1 minute and don’t skip the flip for maximum crunch.
Common Mistakes to Avoid
Overcrowding the basket: Stacked onion rings steam instead of crisp. Each ring needs space around it for air circulation. Cook in batches even if it takes a few extra minutes, the texture difference is worth it.
Not flipping at halfway: The bottom stays pale and soft while the top gets crispy. Always flip at the 3-4 minute mark for even browning on both sides. Use tongs to avoid breaking the breading.
Adding oil when not needed: Frozen onion rings are already coated with oil in the breading. Adding too many can make them greasy rather than crispy. Only use oil spray if the breading looks very dry.
Opening basket too early: Checking before 3-4 minutes releases heat and extends cooking time. Allow them to cook undisturbed for the first few minutes.
Not preheating: Cold basket adds 2-3 minutes to cooking time and results in uneven cooking. The brief 3-minute preheat ensures consistent crispiness from the first batch.
Cooking at wrong temperature: Lower than 380°F and breading won’t crisp properly. Higher than 425°F risks burning the coating before the onion cooks through. Stick to 400°F.
Air Fryer Onion Rings: Tips for Best Results
Don’t thaw first: Cook directly from frozen. Thawed onion rings release moisture that makes the breading soggy. Frozen = crispiest results.
Flip once during cooking: Turn the rings halfway through to ensure both sides brown evenly and crisp properly.
Skip the oil spray: Most frozen rings don’t need it, they’re already coated. Only spray if breading looks unusually dry.
Serve immediately: Onion rings lose crispiness within 5-10 minutes. Make dipping sauces ready before cooking starts.
Check at 6 minutes: Air fryers vary by model. Thin rings might be done at 6 minutes, check and add time if needed.
Cooking frozen onion rings in air fryer is all about single layer arrangement and the halfway flip for maximum crispiness on both sides.
Storage and Reheating
Storage: Cooked onion rings keep in an airtight container in the fridge for 1-2 days. They lose significant crispiness when stored but can be re-crisped.
Freezing cooked onion rings: Not recommended. The breading becomes very soft and mushy when refrozen. Better to cook fresh from frozen as needed.
Reheating:
- Air fryer: 375°F for 2-3 minutes (best method for re-crisping)
- Oven: 400°F for 5-7 minutes
- Microwave: 30-60 seconds (they’ll be soft, not crispy)
Pro tip: If reheating from the fridge, the air fryer at 375°F for 2-3 minutes brings back most of the crispiness. Avoid microwave if you want any crunch.
Frequently Asked Questions
How long to cook frozen onion rings in air fryer?
Cook frozen onion rings at 400°F for 6-8 minutes depending on thickness. Thin rings need 6-7 minutes, while thick rings need the full 8 minutes. Flip at the 3-4 minute mark for even browning and crispiness on both sides.
How to cook frozen onion rings in air fryer?
Preheat air fryer to 400°F. Place frozen onion rings in a single layer without stacking. Cook for 4 minutes, flip each ring, then cook 2-4 more minutes until golden and crispy. No oil needed, serve immediately with dipping sauce.
Can you cook frozen onion rings in air fryer?
Yes, cook frozen onion rings directly from the freezer, no thawing needed. The air fryer crisps the breading perfectly in 6-8 minutes, using 70% less oil than deep frying. Just arrange in a single layer and flip halfway through for even crispiness.
What temperature for frozen onion rings in air fryer?
The ideal temperature is 400°F. This high heat crisps the breading quickly while cooking the onion through. Lower temperatures leave the coating soft and pale. Higher than 425°F risks burning the breading before the center cooks properly.
Do frozen onion rings need oil in air fryer?
No, frozen onion rings don’t need additional oil, the breading is already coated during manufacturing. Adding oil can make them greasy instead of crispy. Only use a light spray if the breading looks unusually dry or if you want extra-crispy coating.
Why are my air fryer onion rings soggy?
Soggy onion rings usually mean overcrowding the basket or not flipping halfway through. Make sure rings aren’t stacked, each needs space for air circulation. Also check you’re cooking at 400°F and flipping at 3-4 minutes for even crisping.
Can you stack onion rings in air fryer?
No, don’t stack frozen onion rings. They need to lie flat in a single layer with space between each ring for proper air circulation. Stacking prevents even cooking and results in soggy breading. Cook in batches if needed, each batch only takes 6-8 minutes.
Final Thoughts
Frozen onion rings in air fryer have become my go-to for quick appetizers and burger sides. The formula is simple: 400°F, single layer, flip at 4 minutes.
Once you know how to cook frozen onion rings in air fryer properly, it’s hard to go back to deep frying or the oven. The air fryer method is faster (8 minutes vs 20+ in the oven), uses far less oil than deep frying, and delivers consistently crispy results.
I make these at least once a week for game day or burger night, and they come out perfect every time. From budget store brands to premium Nathan’s, the air fryer handles all onion rings beautifully.
The key is not overcrowding the basket and flipping at the halfway point; those two steps make the difference between soggy and crispy. Once you master this basic method, experiment with different dipping sauces.
Did you try this air fryer frozen onion rings recipe? Let me know in the comments and leave a ⭐⭐⭐⭐⭐ rating below!
Looking for more air fryer frozen snacks and sides? Try these:
- Frozen Mozzarella Sticks in Air Fryer – gooey cheese in 8 minutes
- Frozen Fries in Air Fryer – perfectly crispy in 15 minutes
- Frozen Chicken Nuggets in Air Fryer – kid-favorite in 10 minutes
- Pizza Rolls in Air Fryer – crispy snack in 8 minutes
- Frozen Hash Browns in Air Fryer – golden side in 12 minutes
Leave a Review
There are no reviews yet. Be the first one to write one.